|
PHOTO (click for bigger picture)
|
ACTION DESCRIPTION
|
|
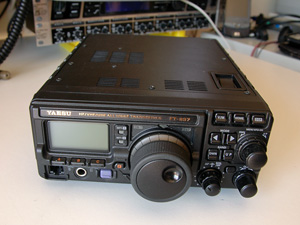
The Yaesu FT-897D ready for surgery!
Have it on a large table with lots of free space. You'll need some space for all the parts that will be taken apart from the unit.
|
|
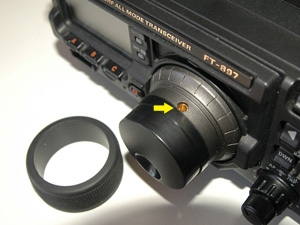
Having the unit on its stand or near the edge of a table (for comodity), place your thumb on the dial center
and with two fingers of the same hand, grab the rubber ring from below and gently pull it off the knob, rotating
the knob so the rubber doesn't deform too much.
Once the rubber ring is off the unit, rotate the knob until the nut hole is facing upwards (like in the photo).
Then, using an Allen Hex wrench of 1.5mm, release the nut so the knob can be pulled off the encoder axis.
|

|
Remove the coil spring and the plastic washer from the encoder axis.
To release the encoder, the brass threaded nut must be removed. But this step will only be taken after the the panel assy has been pulled off.
|
|
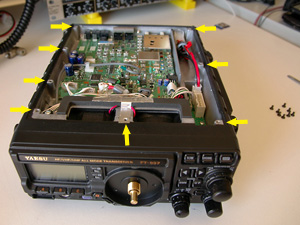
Remove the top case panel using a size 0 or size 1 Philips screwdriver.
There are 8 screws to be removed from the edges of the panel. The couple of screws near the middle of the panel hold the speaker in place. You don't need to touch these screws.
Once the screws removed, gently pull up the panel looking inside the radio. You'll see the cable from the battery switch and the cable from the speaker. Unplug these cables.
The battery cable connector has a finger-lock. The speaker cable can be unplugged just by pulling it off.
|
|
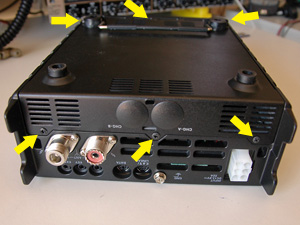
Remove the bottom case panel using the same screwdriver as in the previous step (the screws are of same type - Oval head screw M3x6B.
There are 6 screws to be removed: 3 from the main panel's face, and 3 from the rear's face.
Once the screws removed, arm the radio's stand and remove the panel by pulling on the stand.
|
|
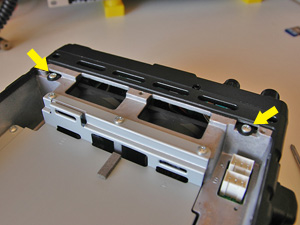
In order to be able to remove the unit's front panel assy, there is a total of 4 screws to be removed. Two M3x6 (white)
screws in the bottom side of the unit (the ones shown in the photo), and two others in the top side of the unit (see next step).
Remove these screws using a size 2 Philips screwdriver.
|
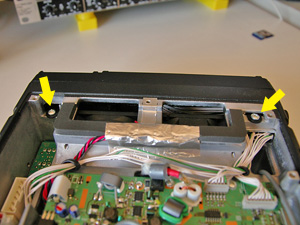
|
Remove the two screws marked on the photo, in order to be able to remove the unit's front panel assy.
|
|
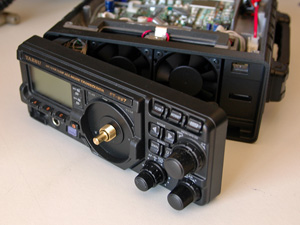
Once the 4 previous screws removed, gently pull the front panel assy being careful about the cables linking the panel and the unit.
|
|
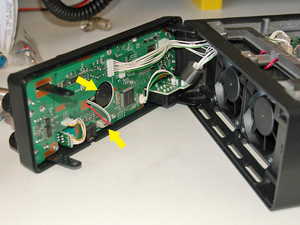
Another view from the front panel removed from the unit.
Now you can see the back side of the encoder and it's 4-wire connector.
|

|
Now it is time to remove the brass threaded nut from the encoder. Unscrew this nut using a large pliers. Don't apply too much force on the pliers to avoid damage on the nut's thread.
Gently push on the encoder axis towards the rear of the radio. The encoder should fall from its place. Unplug the encoder connector from its socket.
|
|
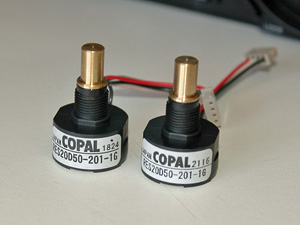
The old and the new encoders, side by side.
Can you figure out which one is the faulty one?...
Encoder references:
YAESU Part Number: Q9000709
Manufacturer: COPAL Part Number: RES20050-201-1G
You are now ready to put the new encoder in place and put your unit's parts back together.
|